Thursday, March 28, 2013

Mozzarella, The Good, The Bad, and The Ugly

Oh cheese.... Another wonderful form of controlled spoilage that I just can never seem to get enough of! From beer and wine to bread and sauerkraut, I love to ferment things. So the next logical choice in my crazy randomness is cheese. Mozzarella cheese to be exact. Now do not confuse this with traditional Italian mozzarella, this wonderful stuff here is a quicker and more of an American flavor of cheese. 
I originally found this recipe on Pinterest but changed it a bit when some ingredients where hard to find.
Mozzarella
1 gallon whole milk (Pasteurized, NOT Ultra-Pasteurized)
1 Tsp citric acid (found this at my local whole food store, or brew shop)
2 Junket tablets *
2 tsp kosher or canning salt **
Large pot 
Thermometer
Slotted spoon

* After a lot of research I read several posts about not using Junket to make cheese... Well I was successful when I used it. It is easily found at most grocery stores in the baking isle by all the Jello. 1/4 rennet tablet can be used also and can usually be found at a whole foods store, mine was out and being the impatient person I am, I improvised.
** The original recipe called for cheese salt, but good luck finding it easily. The main thing is you do not want to use iodized salt, so kosher or canning salt works just fine. The finer the salt the more easily it dissolves. 


In your pot pour your milk and sprinkle in the citric acid, and then heat to 90 degrees F over medium, medium high heat. I stir the whole time just to prevent any burning and to make sure it does not get too hot. 


When your milk has heated up to the right temperature, Dissolve the two Junket tablets in about 1/4 cup of warm water, then pour into the milk and stir only for 20 seconds. This, I have found out, is where things can go wrong.... More about that later.


My milk getting up to temp.


Let the milk and rennet mixture sit UNDISTURBED for 30-45 minutes. The picture above it what a good separation looks like. From here, take a long knife and cut into the curd making a 1 inch grid pattern. Then taking your slotted spoon carefully scoop out the curd and place it into a microwave safe bowl. Here, just so you know, is another spot that I had a boo boo on.
Once you have as much curd as you can in your bowl, microwave this for about 45 seconds at a time, stirring between each, until the cheese starts to clump together.
IT WILL BE HOT!!! 
So wear gloves or just be careful when you start to knead and pull your cheese. Add your salt a little at a time, folding it into the cheese until its gone. Once your cheese feels smooth start to shape it into a ball or log shape, and place it in ice water to set the shape.

TADA!!!! CHEESE!
I wrapped mine and ate it within a few days.

Now for the ugly side...
My first time making this cheese went picture perfect and awesome, but the second time did not go so well.
The second time I made this recipe my curds broke apart and looked more like ricotta then mozzarella, and after some research this is what I figured out:
*When you add the dissolved tablets, DO NOT STIR TOO MUCH! 
As soon at the rennet is added the milk immediately starts to curd, and by stirring it too much you can disrupt  the curds and break them up too soon.
*Not acidic enough. Since this recipe worked fine the first time I made it I don't think this was the problem but if you follow everything right and you notice your curds not working, let it sit for 24 hours to help it build a natural acidity.
*Milk was Ultra pasteurized instead of pasteurized. I used the same milk so I know that wasn't my problem
*Not separating whey from curd when reheating. I thought it was not a big deal but looks like it is. You have to be able to mash the curds together when microwaving, and when there is too much whey it breaks it up instead of clumping together.
*The last problem I read about was using Junket instead of real rennet.
Well since it worked the first time no problems, I did not think that was the issue.

I hope this helps, and trust me I plan on making this again!


Tuesday, March 26, 2013

Two year old wonder

For anyone who has an overly curious two year old... I am almost positive that I don't have the only one.
This is Maddox, M Dog, Teeto, Bean, or Mad Man. He loves to take things apart, and attempt to put them back together, although not always the way they were. He loves long walks, and playing in the mud. But unfortunatly the cold weather has made his favorite activities harder to do.
So with his help we have been making fun little activities for him to do, and this has been our latest success.
FLUBBER!!!
3/4 Cup Water
1 Cup White Glue
Food coloring of choice
Mix this in one bowl
1 1/2 Tsp Borax
1/2 Cup Water
Mix this in a second bowl
Now pour glue mixture into borax mixture and BAM! You get this goopy substance.
I just kind of kneaded it in the water until it came together.
Now the fun begins! I sat little Mad Man in his high chair and gave him the stuff and several bowls and even a fork.

He was unsure at first, but before we knew it he was having the time of his life!


He loved how it stuck to itself and the noises it made when he shoved it in a cup.


And suprisingly he had no interest in eating it which was good...
DO NOT EAT IT!
Some got on the carpet, and some got on him... But I had no problem picking it up off of stuff.
This was a great activity to stimulate his little mind. And it kept him busy for almost an hour!

Chemistry and Soap

Soap Making!
Starting last year I got real into making soap from scratch. And after a lot of research I got the guts to try it.
Below is a Lye soap I made last week, I love lye soap because it is made up of only lard and lye, and it is an amazing all in one soap. I grate it and use it in my homemade laundry detergent, or keep it by my sink to wash little hands with. I have also read that it is good for all kinds of skin issues, including eczema, and poison ivy. And I guess hunters like to bathe with it because it cleanses off the "human" scent.

Below on the left is lye soap and on the right is my lavender soap.
It was a new recipe that my friend Jackie helped me make and it includes Shea butter, Castor oil, olive oil, and coconut oil. I also LOVE to use dried lavender buds for the scent and a mild abrasiveness. It doesn't smell like much until you get in a hot shower and lather up with it and I swear I could sleep right in the shower!

Once you understand how the soap process works and you take the right safety precautions, soap making is so much fun and so addicting.

Monday, March 25, 2013

Macrame!

Macrame!!!
Late summer last year I was asked if I knew how to macrame. Of course if I dont know how to do something I will find out, and after searching and reading on the web, I did!
Using the above website I fashioned my own simple version.


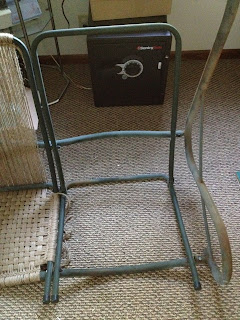
 This was a swing for a proch and it originally had fabric cushions.


The verticle strings seemed almost too loose to me but once you start weaving everything really tightens up.
 This is the final product! I used jute rope for this so it was a cheap fix that looks nice and is not too bad to sit on either.

Busy B

     Hello!!! Oh my it has been a while hasn't it! I'm super excited because I have been busy working on some of my projects that I have let fall to the way side. This is why I love spring, becuase a lot of my fun stuff that I love to do it better done in nicer weather.
     Well first off I have been working on reviving my bread sour. Waaaay back in 2011 shortly after the birth of my son, I started a sour from grapes, flour, and water, and when it was nice a bubbly I dried alot of it. It is a great idea to do this just incase anything happenes to your original sour. Mine just got neglacted so I dumped it and just started new from my dried sour I had on hand, and after only two days it has started bubbling away. I love to make bread and pancakes from this sour!

Sourdough Pancakes
2 Cups Sour
2 Tbs Maple Syrup or Honey
3 Tbs Oil
2 Eggs
1/2 Tsp Salt
1/2 Tsp Baking Soda
1 Tsp Baking Powder

Mix all together and make it like any other pancake on the stove top.

Rustic Sourdough
1 Cup Sour
1 Cup Water
2 Tsp Salt
3 Cup Flour
Mix together just until flour is no longer wet
Let it sit until it doubles in size, this may take over night depending on how "happy" the sour is.
Carefully scrap out of bowl and place on pan and sprinkle with flour and let it sit until it doubles in size, this may also take over night.
The bread takes a long time but the flavor is so worth the wait!


    This is only one thing I have been working on out of many! I will update here as I go.